2010/06/08

Is Every New OS Secured/Stable?


Salam Anak IT.
If you are a computer "geek", what will you do if you heard any OS developer saying that their new Operating System is released? Get it straight away?... Or wait until everyone is using the OS?...
Here are some advices, mostly based from my personal experience. There are some drawbacks of the new released Operating System that you reeaallllyyy need to consider:
  1. Alum luan stable banar...
  2. Hardware incompatibility "cornflakes"
  3. Poor graphic manipulation
  4. Risk of data loss
  5. Performance kureeeng~
  6. Availability of Security loopholes
  7. Requires to download soooo many patches
  8. Makes the user kambang "aku makai OS baru dah~ wooooo~"
  9. Dan yang sewaktu dengannya
I believe there are many more of these but that depends on which type of Operating System implemented.
I remembered last time when Windows Vista was freshly released, everyone was talking about it... "Bui... Ko makai Vista dah?", "Jeng... Di mana berulih tue ah Windows Vista ah?", "Dapat ko formatkan laptop ku jadi Windows Vista?"... And guess what... In the end, "Bro... nyasal plang ku makai Vista ah...", "Dapat kita downgrade kan my laptop from Windows Vista ke Windows XP?", "Laptopku system-crash ahh!! Miana kan tue?!"... Alum lagi yang jenis penyumpahan tue hahaha...
So, I suggest if there is a new OS release that you want to try out, try it with your secondary or less important machines, not with the machine which you are using to deal with daily activities.
Sekian, semoga mendatangkan manfa'at.
Wassalam.

2010/06/06

CTRL + ALT + DELETE


Salaaammm~
This is especially goes to WINDOWS OS users...
Have you ever experience system freezed? Hang?
If something like that happen to your system, what will you do?
I bet 98% of you probably already know what you will need to do. But this goes especially to the other 2%.
Press CTRL+ALT+DELETE simultaneously at a time!

When the "Windows Task Manager" appears, "End Task" any application with "Not Responding" status.
If masih jua matingal nda mau, takan switch on/off rah komputer biskita batah-batah sampai ia pajah, then takan lagi sekali.

Sekian, wassalam...

P/S: Mun rasanya payah-payahan, switch to Ubuntu, end of story~ <laugh>gyahgyahgyahgyahgyahgyahgyah</laugh>

2010/06/04

Common Network Topology


Assalam Anak IT Readers...
There are several types of Network Topology:
(Image from KnowledgeRush.com)

You may not be familiar with some of the topologies above. For this article, I will only briefly explain the common network topologies in bullet points.

Bus Topology
  • An old topology (maybe inda lagi tedapat masa anie)
  • Menggunakan Coaxial Cable (lebih dikenali sebagai Thinnet. Ada jua yang menggunakan Thicknet) with BNC connector
  • Each terminal connects to the continuous cable which connect them all in straight line
  • Each cable end is "terminated" with terminator device which it "absorbs" all the current signal so that it would not bounce back to where the signal came from... *imagine*
  • If something happen to that straight line cable, most certainly it will affect the entire bus network or at very least, having communication problems between workstations

Ring Topology
  • Just like namanya, this network topology looks like a ring or nya urang kitani "membulat" haha
  • Some network professionals says that it is just like a linear topology, it is just that ujungnya bebalik rah the first workstation instead of kana terminated like in bus topology
  • You may call it "Loopology Network" since the signal goes in circle and looping
  • Token Passing method is the method used to transmit the data from a workstation to the next workstation in circle
  • Cable used? Coaxial cable (Thicknet) and ada yang makai Fiber Optic

Star Topology
  • Bintang punya shape where the workstations are not directly connected to each other but through a "special" device or apa nya kitani as "Postmen", makai urang tangah =)
  • This is the most common network in a small Office/Home Local Area Network (LAN). If biskita makai e-speed dirumah, cuba peratikan banar-banar computer biskita connect ke mana... Router? Switch? Yetah namanya "urang tangah" tue... Your other siblings' computers are also connecting to the same "urang tangah" device. Most of us use router since we directly connect to internet through a modem. So imagine if biskita kan transfer lagu arah laptop adi beradi biskita yang lain through "File Sharing", data lagu atue inda directly mengaga arah laptop adi beradi biskita atue but ia mesti melalui "urang tangah" which is router biskita. (unles biskita makai P2P with Crossover Cable)
  • If satu cable inda working, it will not affecting the entire network
  • Uses Cat5/5e/6 cable with RJ45 connector

Mesh Topology
  • Mesh is usually connect to more than one workstation in order to communicate with another workstation
  • One to Many connection?
  • Internet uses this topology
  • If one connection broke down, no problem pasalnya ada another connection still exist =)

Hopefully that will at least help you to understand basic computer networking. If biskita ada kan ditanya, simply send your enquiry here.
Sekian, Wassalam...

2010/05/29

Hardening your USB Drive


Assalam...
Last time, the admin posted an article of "Defend your drives from AUTORUN.INF malware" and it is recommended that you read that article first before you proceed to the next paragrapgh...
This article may be a continuous article from the article mentioned in the previous paragraph but it is actually more into "hardening" to "protecting". The following steps require you to use any Linux-based Operating System. The reason is that, Windows OS will NOT allowing you to do this kind of activity hahaha *obviously*. In this tutorial, I will use my favorite Ubuntu (Karmic Koala) OS.

After you have created the "autorun.inf" folder based from the previous "Defend your drives from AUTORUN.INF malware" article, go inside the folder and then
  1. create a folder named "con" and
  2. create a file named "desktop.ini"

Using a text editor (gedit in Ubuntu), simply type in the following parameters inside the "desktop.ini" file:

Or copy and paste it from here...
[.ShellClassInfo]
CLSID={2559a1f2-21d7-11d4-bdaf-00c04f60b9f0}
Save the "desktop.ini" file and close the text editor. Next, go inside the "con" folder and then create a folder name "aux".

Inside the "aux" folder, create another folder named "nul. ", followed by your favourite words with "dot" in within the words. For example, I named the folder as "nul. Bwua.huhwu.hauhwa". Now you are done =) hehe

Oh... Lupa gitau... If you want to create a folder in Ubuntu OS, right click on the blank spaces inside the window and click on "Create Folder"...

Cabut USB drive biskita and pacak arah any Windows OS-based computer... I used my Windows XP to examine the result... As you can see, the folder's icon has been changed to "kunci manga" and try to click on it and see what will happen... The answer is, "nothing" will happen hahahaha... I haven't try this technique on Windows Vista or Windows 7... Let us see if someone actually can access the file from Windows OS other than Windows XP else it would be still prone to autorun.inf malware (malicious software) attack...

Hopefully that would give benificial to all of us and help you to minimise your USB drive especiallypengdrive from being infected by other machines...

Sekian, sampai jumpa lagi~

Wassalam.

2010/05/27

The Lasso Tool

Assalamualaikum,
After a while of not posting on anak.it I've decided to go with a very basic tutorial that a friend of mine has requested recently, which is how to lasso an object, person and so on.  One thing I know about lasso-ing to complete "perfection" is that you need patience and a good eye.
To start off, I've picked this picture of fellow member Fadhullah as an example.

Second step, on the left side you will see a column of tools, look for the Lasso Tool icon as circled above, right click on the icon and left click on "magnetic lasso tool".
Third step, left click on the image where you want to start and just circle around that object/person, make sure to have both ends meet or just double click to join the ends. The selected area will be represented by "marching ants". You can try to make it as perfect as you can, but if it doesn't turn out the way you want it to, don't panic, I'll tell you how to fix it.
Fourth step, like the image above, if you have accidentally lasso-ed a part of the image that you don't want to lasso simply hold down the alt key and left click on your mouse, release the alt key and move your mouse to "throw away" the unwanted parts. Make sure to have both ends meet or double click.
Fifth step, just like the fourth step, you can do the same alt + left click to take away the image in between, say, the arms to create a gap.
Sixth step, in cases where you want to select the part of the image that you accidentally left out, you can just hold the shift key + left click and go over the area that you missed. This is especially essential when it comes to parts of hair that sticks out.
To lasso the "exact" part of the image that you want, make sure to zoom into or out of the image by pressing ctrl together with the + or - signs so it can be as precise as you want it to be. Be prepared for sore eyes.
This is basically the end result of the lasso-ing of Fadhullah's image that I've done. If you want to select the reverse of what you have lasso-ed just press ctrl + shift + i, you can add effects to the background or just simply delete it by pressing the delete button. That's pretty much all I have for now on the Lasso Tool. Hope this was helpful.
For this post, I will show you an easy way to colourise a black and white brush like the image below

First thing you’ve got to do is pick a brush of choice, for my example I’ve chosen this brush from here. When you’ve thought of what brush you want to use you should always create a new layer before you start pasting the brush so you can just easily delete it if you ever change your mind. To do so, you should click the new layer icon in the lower part of the layer’s section like so,
Layer 1 will pop up in the layer column and you can then paste the brush there. After pasting the brush of choice you can now begin selecting colours. Again, this is essential for you to
1. create a new layer, you can name this layer by the name of the colour, like such
2. Make sure you change your brush to basic brush through the icon circled and numbered (2.)
3. Colour over the part of the image that you want to be colour like in (3.) then change the blending mode from Normal to Soft light or overlay, but in my opinion it’s better to just use soft light. (This can be found in the Layers’ column next to opacity in case you didn’t know).
You can then repeat this process of colouring to the other parts of the image with different colours. Take note that you should ALWAYS create a new layer because if you use the same layer with different colours you might end up with deleting the whole colouring when you just want to remove a single colour in the end. But then ctrl+alt+Z can be used too but that would be of limited use as the history won’t fully be there. This is basically what I’ve done to the brush
And this is the result when I apply the soft light blending mode to the colours,

Notice that the headphone isn’t coloured, that’s because super black images can’t be coloured. You can try though, but I won’t really pop-out as much as the rest of the image. Anyway, I hope this tutorial was helpful. Again, for more inquiries, please go to the “Miana Kan Tue?” section above.
Experiment, experiment, experiment.

2010/05/22

Broadband Modem


Salam Anak IT.
Al-kisah...
Pada suatu hari... Hajah Kilala meminta bantuan daripada Awang Nitwok...
Hajah Kilala: Wang... Minta tulung ku...
Awang Nitwok: Mengapa ya kajah?...
Hajah Kilala: Atue bah... Modem Broadband ku ani baru jua ku membali kelmarin dari urang arahBruDirect... Ia cakap baik masih... Tapinya ani langsung inda mau...
Awang Nitwok: Oh... Prepaid kah? Line kita DST or B-Mobile?
Hajah Kilala: Line ku DST...
Awang Nitwok: Barang kali inda berisi kredit pakah...
Hajah Kilala: Berisi eh... Kelmarin jua ku recharge... Cuba ko miskol...
Awang Nitwok: Miskol?... Apakan?...
Hajah Kilala: Mubail ku bah... Cuba ko talipaun... Ada kredit tu masih...
Awang Nitwok: Kita ani kan online makai mubail kah ataupun modem kita anie? *sambil menunjuk arah modemnya*
Hajah Kilala: Modem ani lah... Iatah ku bali untuk ku kan online ni... Padah anak ku ada urang bejual kain lawa-lawa arah apa namanya tue?? Pisbuk??... Yetah kan meliat nie...
Awang Nitwok: Modem biskita ani ada SIM card sudah?
Hajah Kilala: SIM Card?? Untuk apa lagi tue? Bukan selajur dapat online kah?...
Awang Nitwok: ... ... ... -_-"
Yes... Untuk biskita yang masih alum tau cana makai Broadband melalui Modem yang makai USB atue, mesti ada 3G-type SIM card either from DST or B-Mobile (if di Brunei)...

Sekian, harap maklum...

2010/05/20

The Importance of Doing Research


Assalam...
Last time I was doing a research on Brunei's history and came across the following image:

I was wondering... "how come?"... If you are given a task to design or draw a specific image, make sure you at least do a little research or else the result might turn out to be just like in the picture above...
Just to share it with biskita untuk sama-sama memikirkannya... Sekian..

2010/05/18

Basic Print Screen Trick


Salam Anak IT.
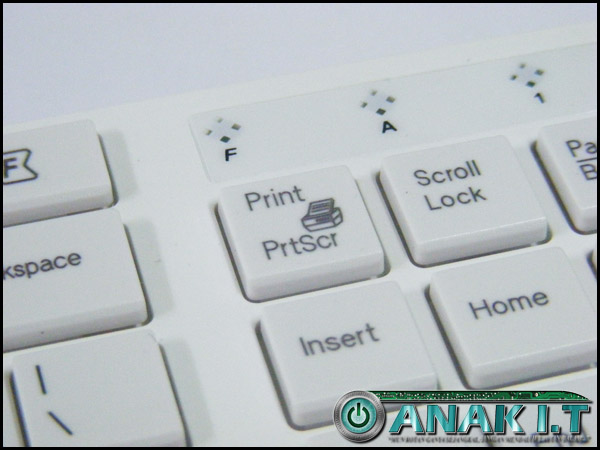
"Print Screen" key on my keyboard

How many of you treat the "Print Screen" key on your keyboard as a friend? Those who are doing assignments on "System's User Manual" will most probably familiar with this feature. Last time when I checked someone's system documentation from the technical college, I found out that there are people who always use the Print Screen key but are not doing it properly. What they always do is that simply paste the whole thing in a word processor that they are working on (such as MS Word) and then CROP the image... As results, there are "extra" irrelevant bitmap pixels on every edges of the image.
For example, I want to get the screenshot of one specific window. When I press "Print Screen" key alone, it will give me like the following image:

You do not have to worry if it is a little bit "weird" for you since I am using 2 monitor screens extended but yes, the "Print Screen" key did capture the whole screen... I only want to capture the PDF Reader's window with the "BRUNEI DARUSSALAM" wording in it... How am I going to do that?... Is that even possible?...
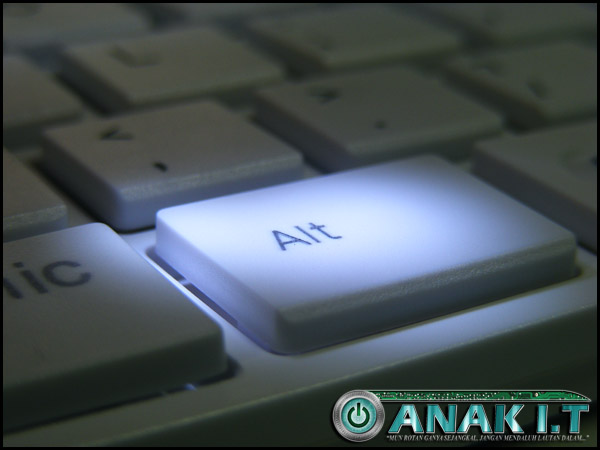
The "key" of making it possible is the "Alternate" key or also known as "Alt" key.
"Alt" key on my keyboard

Try to combine the "ALT" key with the "Print Screen" key and paste the clipboard item into any image processing applications (Adobe Photoshop, GIMP, MS Paint etc.) and see what will appear. Make sure that the targeted window is "active" in a way that it is "selected"? Hahaha lebih kurang miatu la...
The expected result

Try to experiment other combination of key as well such as CTRL key or even SHIFT key and examine the result for your own knowledge and skill.
That is it for today. If you have any doubts or questions to ask, let me know through this online form.
~ Terima kasih daun keladi, ada idea jumpa lagi ~
Sekian. Wassalam.

2010/05/16

Network+ Certification


"The CompTIA Network+ certification is the sign of a competent networking professional. It is an international, vendor-neutral certification that proves a technician’s competency in managing, maintaining, troubleshooting, installing and configuring basic network infrastructure.

Since its introduction in 1999, more than 235,000 people have become CompTIA Network+ certified. Microsoft includes CompTIA Network+ in their Microsoft Certified Systems Administrator (MCSA) program, and other corporations such as Novell, Cisco and HP also recognize CompTIA Network+ as part of their certification tracks.

Although not a prerequisite, it is recommended that CompTIA Network+ candidates have at least nine months of experience in network support or administration or academic training, along with a CompTIA A+ certification.
" - CompTIA
CompTIA Network Certification Path
Network+ (N10-004 v2009) Certificate
For further information on the Network+, go to CompTIA's website at http://www.comptia.org/certifications/listed/network.aspx or simply click here. Those who need some guidance on the certification, you may approach me.
As Anak IT's motto, "Mun rotan ganya sejangkal, jangan mendaluh lautan dalam" encouraging you to improve and further your skills.
Sekian, semoga biskita mendapat inspirasi dan juga manfaat. Wassalam.

2010/05/15

Using External StyleSheet

I'm assuming if you are reading this tutorial, you already know what Cascading Stylesheet (CSS) is. If you don't, you should head here first.

External stylesheet gives an advantage over inline stylesheet (that is having the stylesheet inside the HTML: it reduces the page load time since the CSS is all inside one file. Moreover, the changes made on that one file are simultaneously reflected on all pages that link to the stylesheet.

So, how do we go about using external stylesheet?

Step 1:

First of all, you will need to have all your CSS codes saved into a file. You can name the file anything you want but be sure to save it as .css extension. Meaning, if you name your stylesheet 'style', the full filename is 'style.css'.

Step 2: 

Upload this file to your server. Take note of the directory where you upload the stylesheet. Usually it is stored in the root directory.

Step 3:

Next, open up your HTML file and stick this line between your tags:


However, if you are storing the stylesheet in a specific folder (not in root directory), for example in a folder called styling, the code will look like this:


Now you may want to know what purpose does the code above serves. The code above is used to call or load up the stylesheet into your HTML.

Step 4:

Save your HTML file (and upload it to your server if you haven't) and you're done!